
loading...
This recipe for Danish Vanilla Cookies, “Vanillekranse,” is something I’ve been snacking on, quite dreamily, since I was a little girl. I first watch Duda Family matriarch, Anna Jorgensen, make these as a child, and I’ve enjoyed tasting her daughter (and close friend) Lise’s version since. It may not be Christmas (yet), but boy,
To see the print-run version of this recipe with The Advocate for Thurs., Oct. 3rd, see here.
—
I spend a lot of time thinking about how we share recipes.
How we write recipes, why we share them and what a particular recipe might tell us about its author. The way we write a recipe allows us to exchange information that is both agreed upon and meant to be reused. It follows a simple format, or, at least, appears to follow one.
But a good recipe always itemizes its ingredients for a quick pantry check and shopping list, offering unquestionable step-by-step instructions with the authority of an executive chef. The Latin root of the word recipe is “recipere,” meaning both to give and to receive. And, recipes, by their very nature, require that we give instructions with specific intentions. Whether we think about it consciously or not, we transcribe recipes hoping they will be shared again and again.
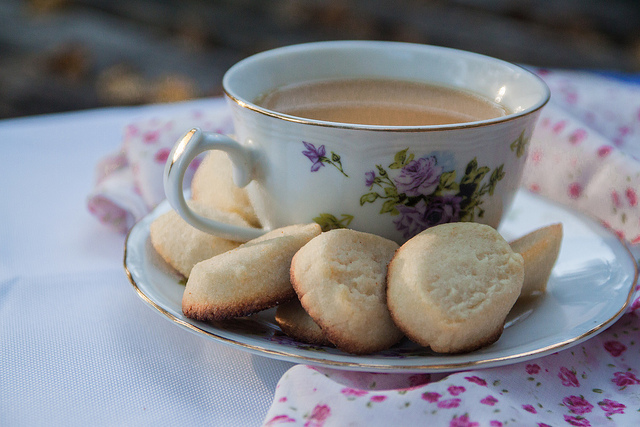
Today’s recipe for “Vanillekranse,” or Danish Vanilla Cookies, has been permanently magnetized to my friend Lise’s fridge for years. It’s one of those simple, delicate butter cookies that isn’t too sweet or buttery and goes wonderfully with a hot cup of coffee or tea. It’s a remarkably simple cookie Lise likes to keep handy that was given to her by her Danish mother, and, now, has been shared with me.
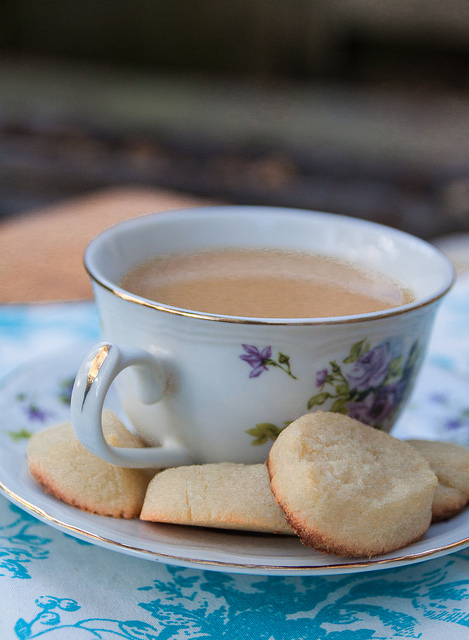
Pictured: Danish Vanilla Cookies, “Vanillekranse,” courtesy of Anna Jorgensen and the Duda family.
The simplicity of this recipe always amazes me. With only five ingredients (no baking soda or baking powder), it can be relayed in two sentences: “Mix all of the above. Can be placed close together on cookie sheet. 10-12 minutes at 350 degrees.”
All of us have seen the family recipe card with its terse instructions that explain a far more complicated dessert or dish. These recipes expect a lot of previous knowledge on the reader’s part, often assuming the recipe has been shared with them before.
And, when transcribing this recipe for future readers, I didn’t really want to change it. I like the original and how it reminds me of my friend Lise’s mother, Anna Jorgensen, who I grew up watching make these cookies every year.
In her kitchen, Anna would stand over a floury surface, kneading the dough together and feeding it through a cookie press. My own mother wasn’t much of a baker, and I remember the excitement I’d feel as each gesture created perfectly textured lines of dough that she’d shape into small—also perfectly shaped—circular wreaths.
When I was about ten or eleven, I asked Anna why she didn’t decorate her cookies with fancy sprinkles or nuts on top. Her answer was as simple as the recipe itself: “because it’s not how they’re made.”
And she was right. That’s not how you make Danish Vanilla Cookies. The subtly sweet vanilla dough doesn’t want for unnecessary garnishes, which is probably why they’re so popular not just in Lise’s home, but also your local grocery store aisle in those iconic blue tins.
And it’s not that recipes shouldn’t be altered. In fact, I highly recommend this. Discovering your personal tastes and learning how to adjust ingredients for your needs are all very important parts of the cooking process.
But, when it comes to this recipe for perfect Danish Vanilla Cookies, I don’t know if this is one of them. With five ingredients, the concept is incredibly simple—mix, bake and eat.
Danish Vanilla Butter Cookies (“Vanillekranse”)
Yield: 4-5 dozen cookies
Prep Time: 10 minutes
Cook Time: 10-12 minutes
Ingredients:
*3/4 lb. butter (3 sticks)
*1 egg, beaten
*3/4 cup sugar
*1 tsp. vanilla
*4 cups flour
OPTIONAL EQUIPMENT:
*cookie press (optional)
*Silpat mat (optional)
1.) Preheat oven to 350F and lightly grease or line a baking sheet with a Silpat mat. Cream together butter, egg, sugar and vanilla in a large bowl. Gradually add flour until dough forms, working in all four cups.
2.) Halve dough and on a lightly floured surface, roll into a long tube, about 2-inches thick. Using a sharp knife, cut dough into ½ to 1-inch cookies. Transfer cookies to baking sheet about 1-inch apart and bake for 10 to 12 minutes or until lightly golden brown.
Optional, traditional technique: Using a cookie press, feed dough through tube with the ribbed attachment. Press dough through tube and shape into wreaths.
—
Follow Me on Pinterest: http://pinterest.com/helana/
Twitter: https://twitter.com/DancesWLobsters
Facebook: https://www.facebook.com/pages/Clearly-Delicious/103136413059101
Tumblr: http://clearlydelicious.tumblr.com/
Instagram: http://instagram.com/helanabrigman
Danish Vanilla Cookies ("Vanillekranse"),
1 Comment
Sue Westergaard
December 9, 2013 at 3:44 amWe had these every year at Christmas, and they were always made at least a couple of weeks before Christams itself. Making them was part of the ritual of preparing for Christmas during Advent.
We never had them at another time of year! That would have felt totally wrong.
They were made into wreath shapes, with a hole in the middle, because the point of them was that they should be hung on the tree with ribbon through the hole, as edible decorations. There is a danish carol that talks about the christmas tree. It says that that first the tree is shown, then the side is eaten – that’s because so many of the decorations were edible. They would be eaten over the Christmas period so the tree decoration depleted over the next 12 days – then, on 12th night, Christmas is over.
To make the hole you roll the dough out to a long thin sausage, which you cut into 2 or 3 inch lengths, which you bend, joining the ends into a circle.
My mum always let the dough rest in a cool place before you form the rings. It makes them easier to roll out.