
loading...
Tip #2: Blow Outs
Fixing exposure is important, but it also creates (or encourages) some lighting problem—blow outs.
“Blow outs” is a slang term that refers to an area where whites and exposure are so bright, they’ve literally been “blown out” and no data is shown (just white, bright light). Sometimes this looks pretty cool and you might be aiming for an over-exposed effect, but most of the time (as with visible, useful food photography), it poses a problem. Why?
Well, blow outs pose a particular problem if you were to go to print. Not only would there be no digital information to be printed in this part of the image, but it also messes with white balance and photo composition.
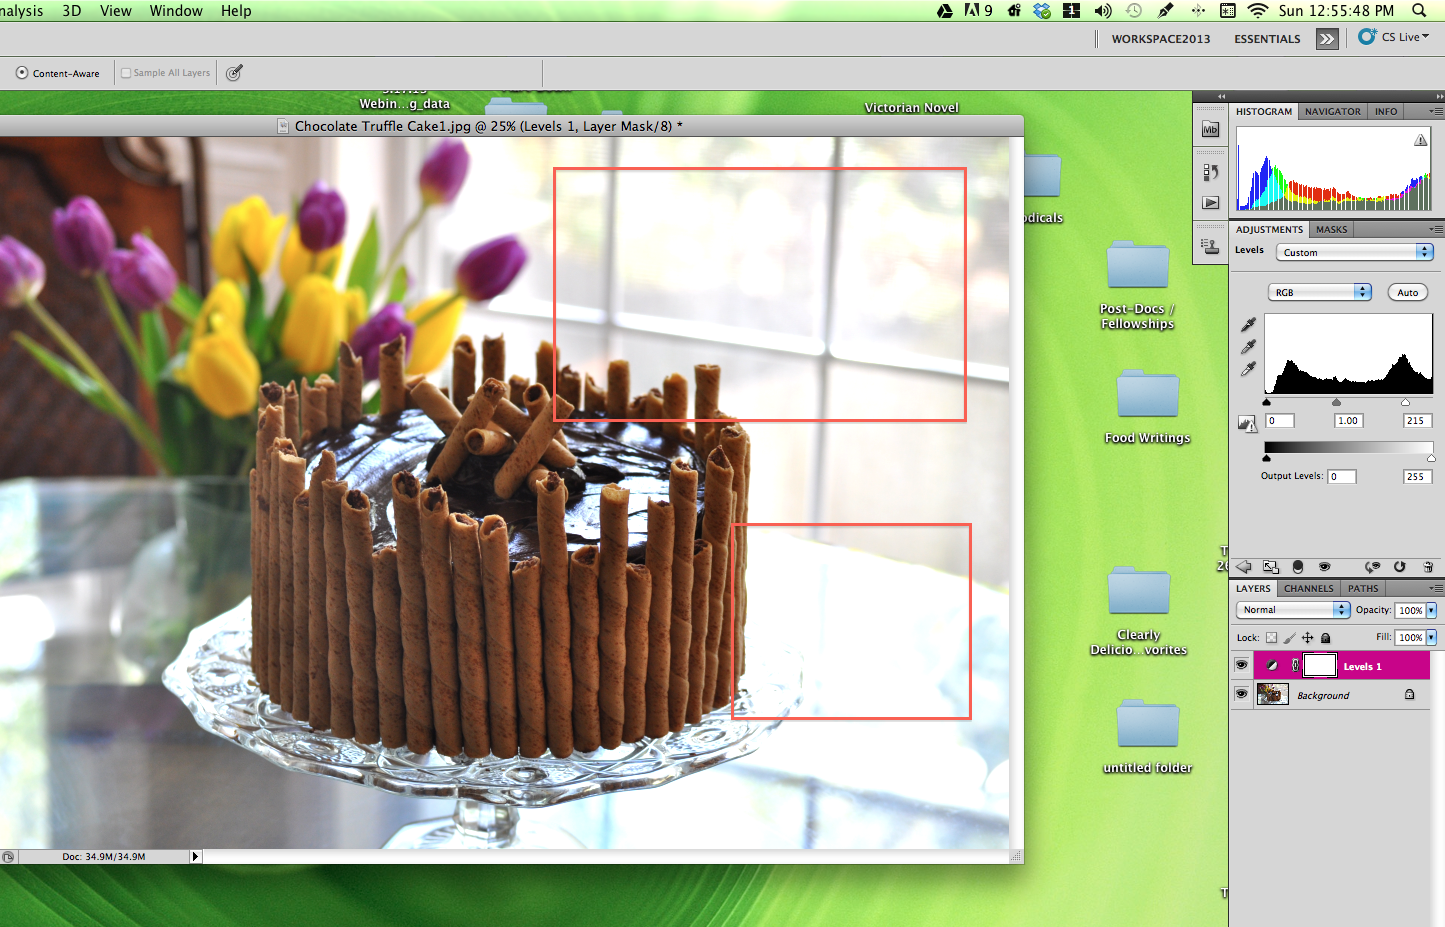
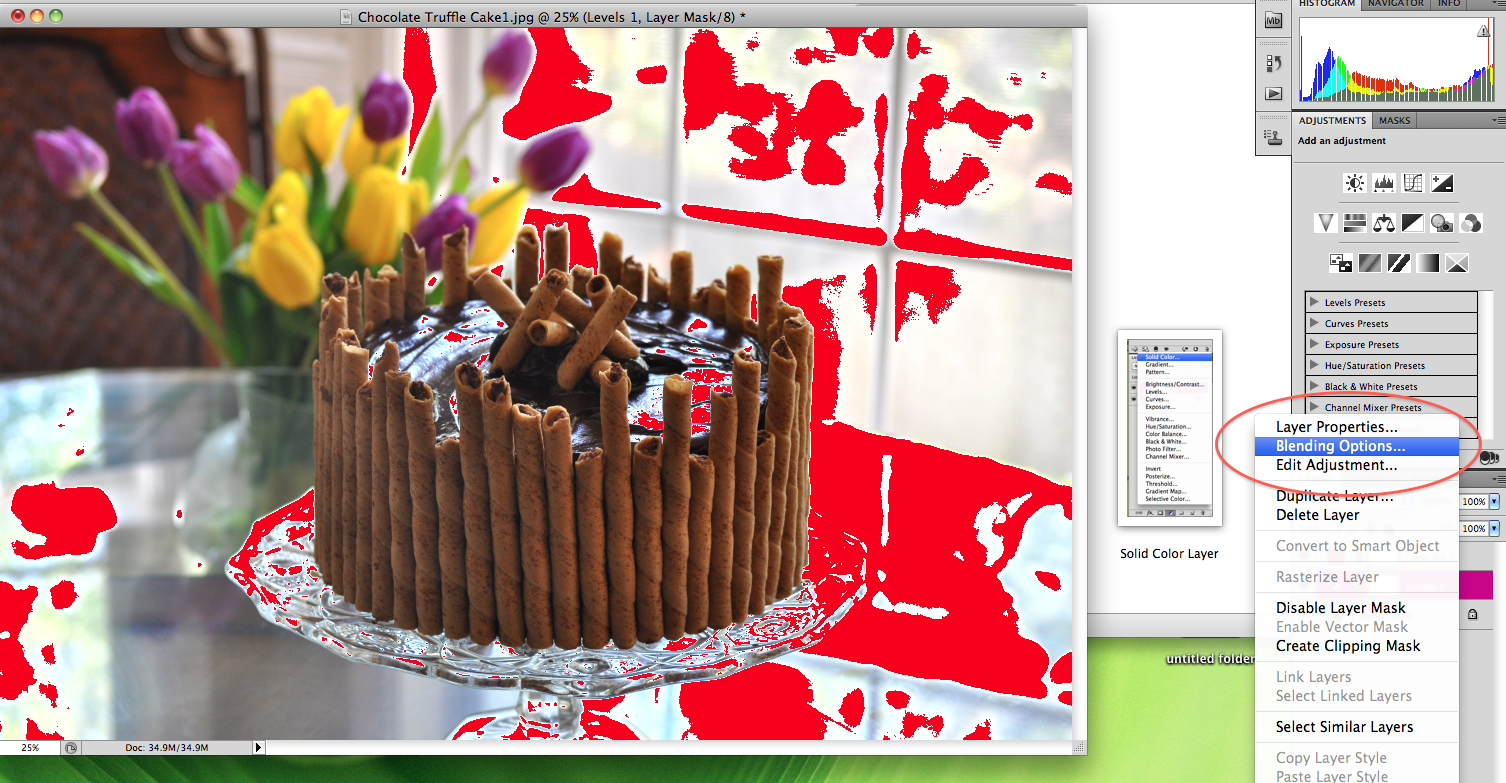
Pictured: blow outs are the areas of extreme lighting or “white” in the image above. I’ve pointed out a few areas where the blow outs are especially harsh.
Here’s an easy fix in Photoshop: correcting blow outs using the “Layers” Feature:
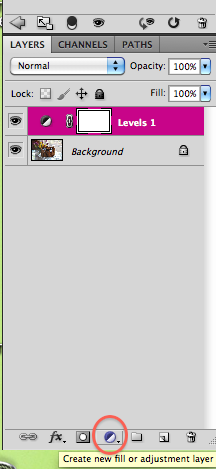
1 – Add a solid color or “fill layer” – right click on the “Fill/Adjustment Layer” icon at the bottom of your screen – this looks like a half black, half white circle:
2 – Scroll to the top of the box that pops up and select “Solid Color”:

3 – When the box asks that you “pick a solid color,” select the brightest red with your icon (merely click on it and hit “ok”):
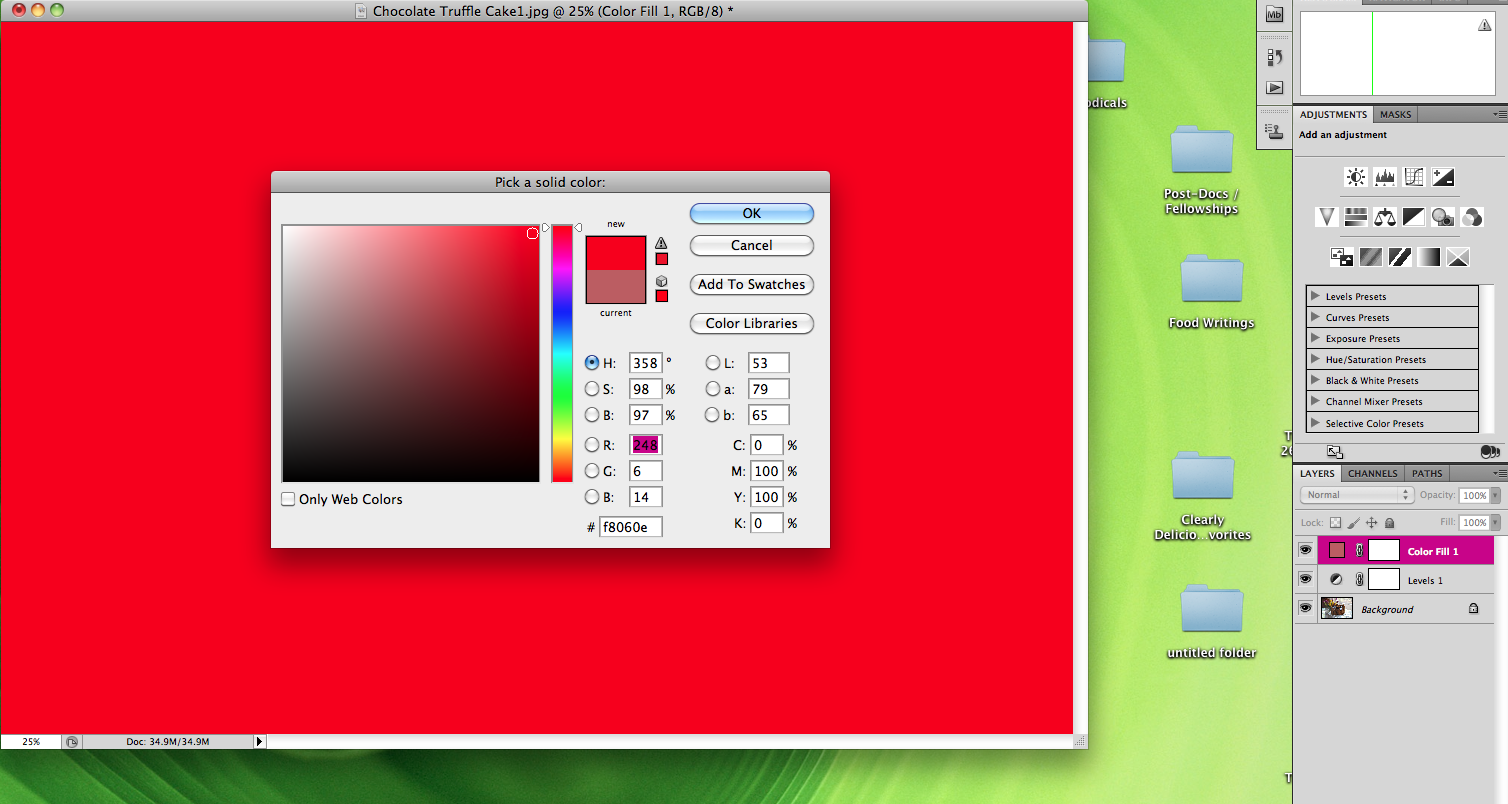
4 – Now, you’ll see an entirely red screen because you’ve simply placed a layer of red on top of your image:
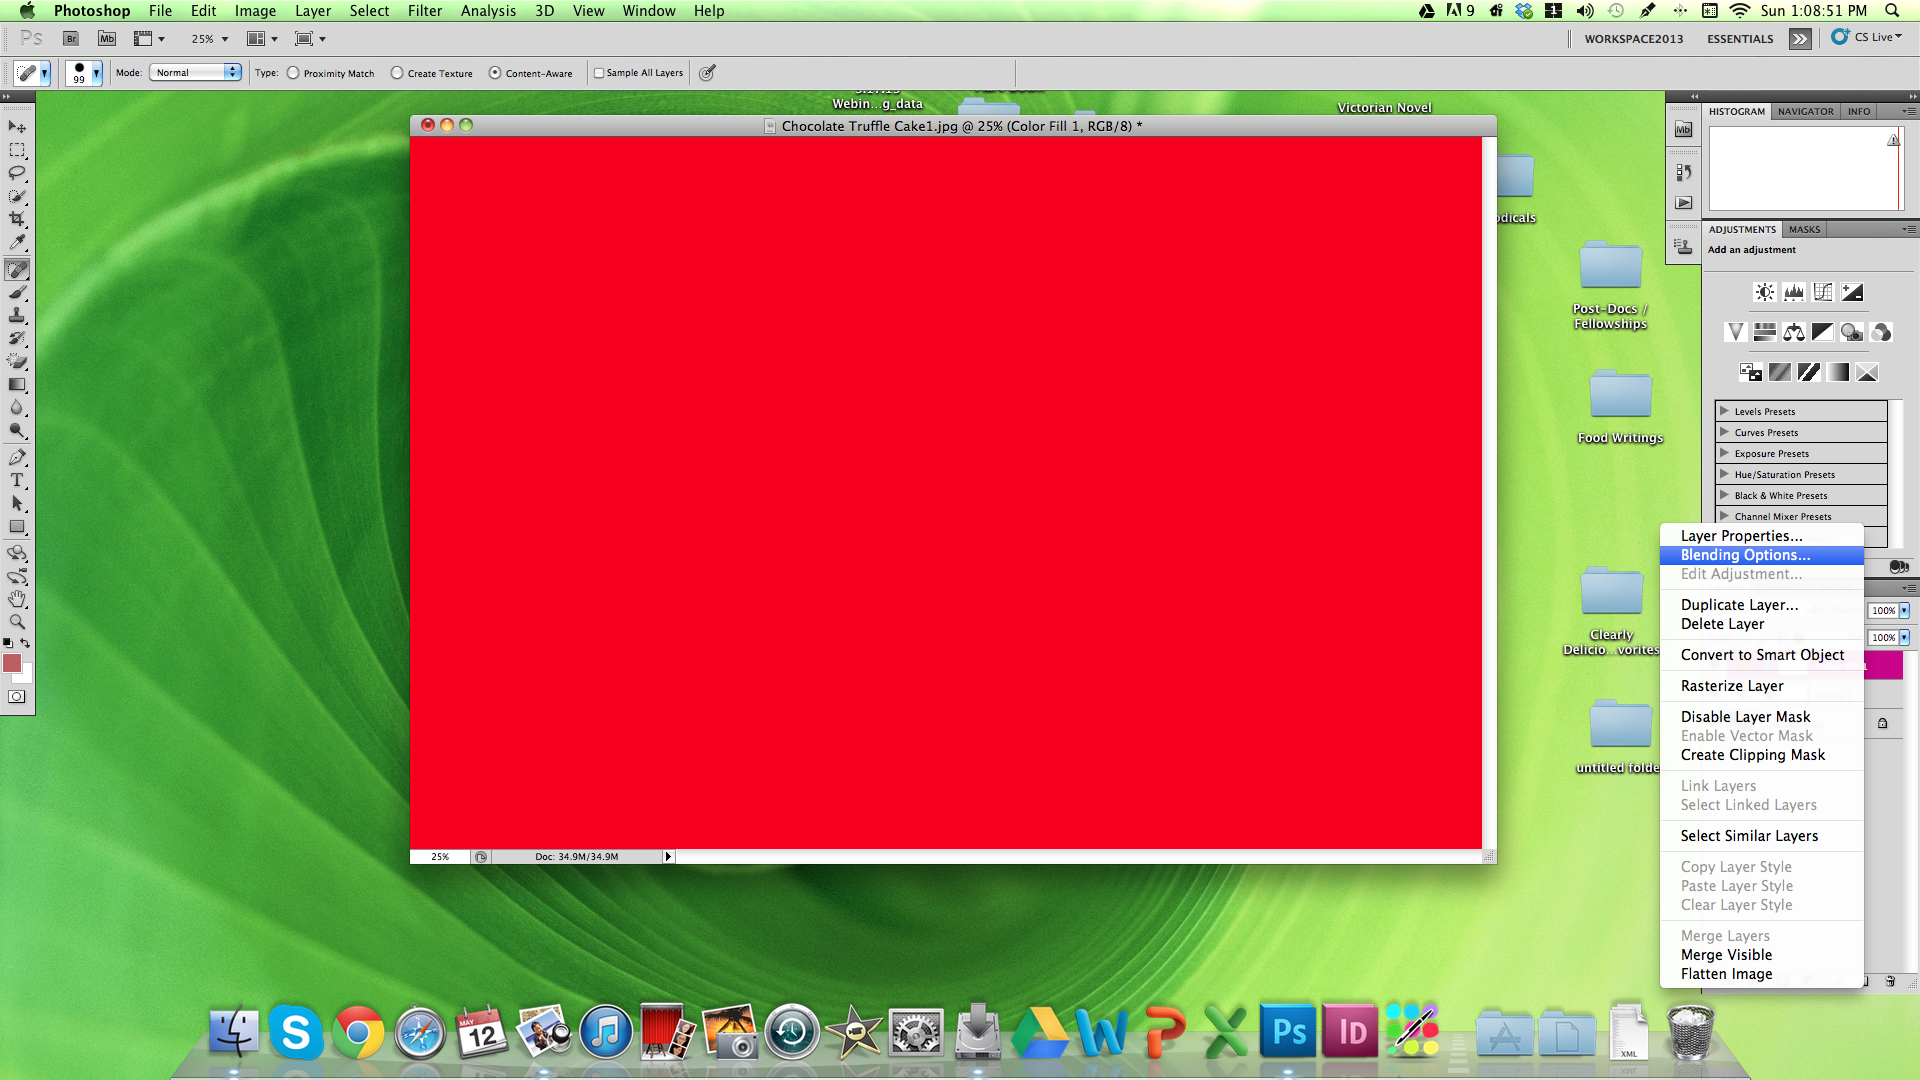
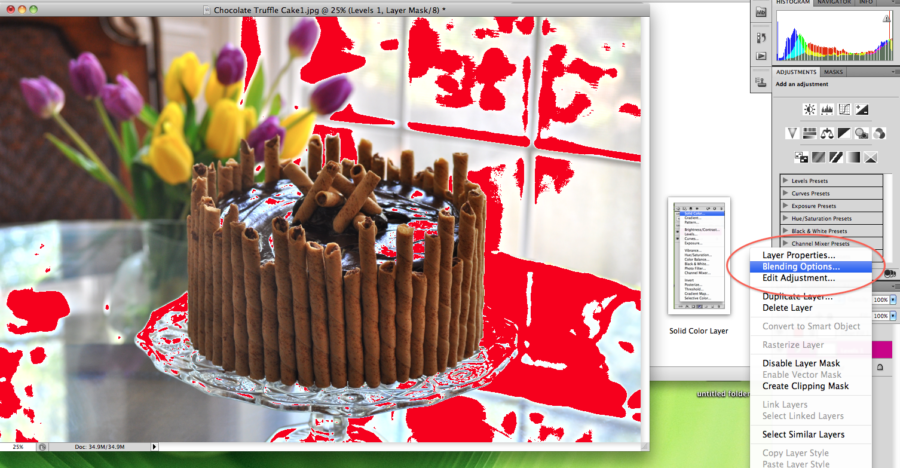
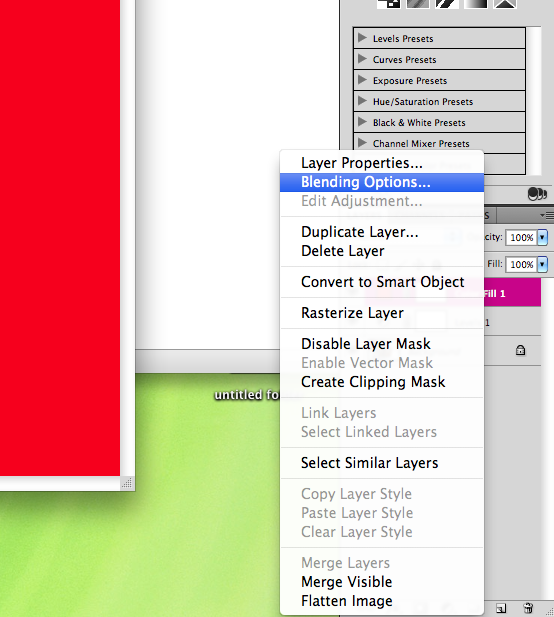
5 – From here, you’ll want to adjust fill levels. Right click on the top box under your layers history that represents the red colors layer you just added. You’ll know you’re right clicking on the correct layer because the box next to your cursor will be red. Select “blending options” at the top of the drop-down box:
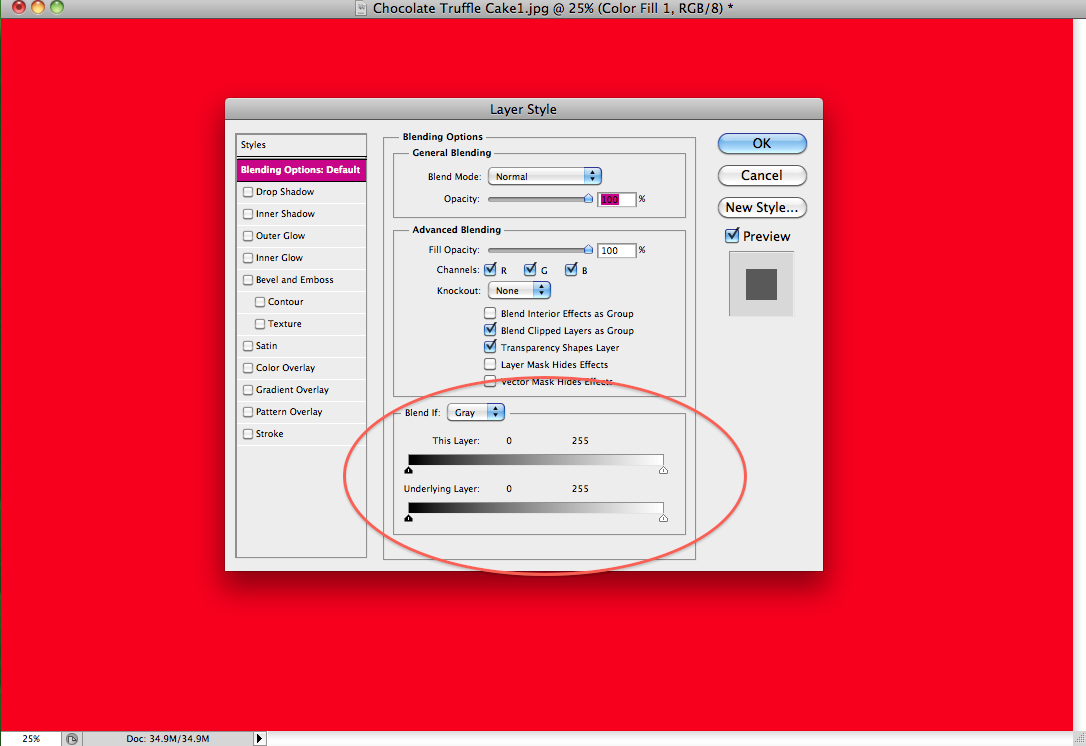
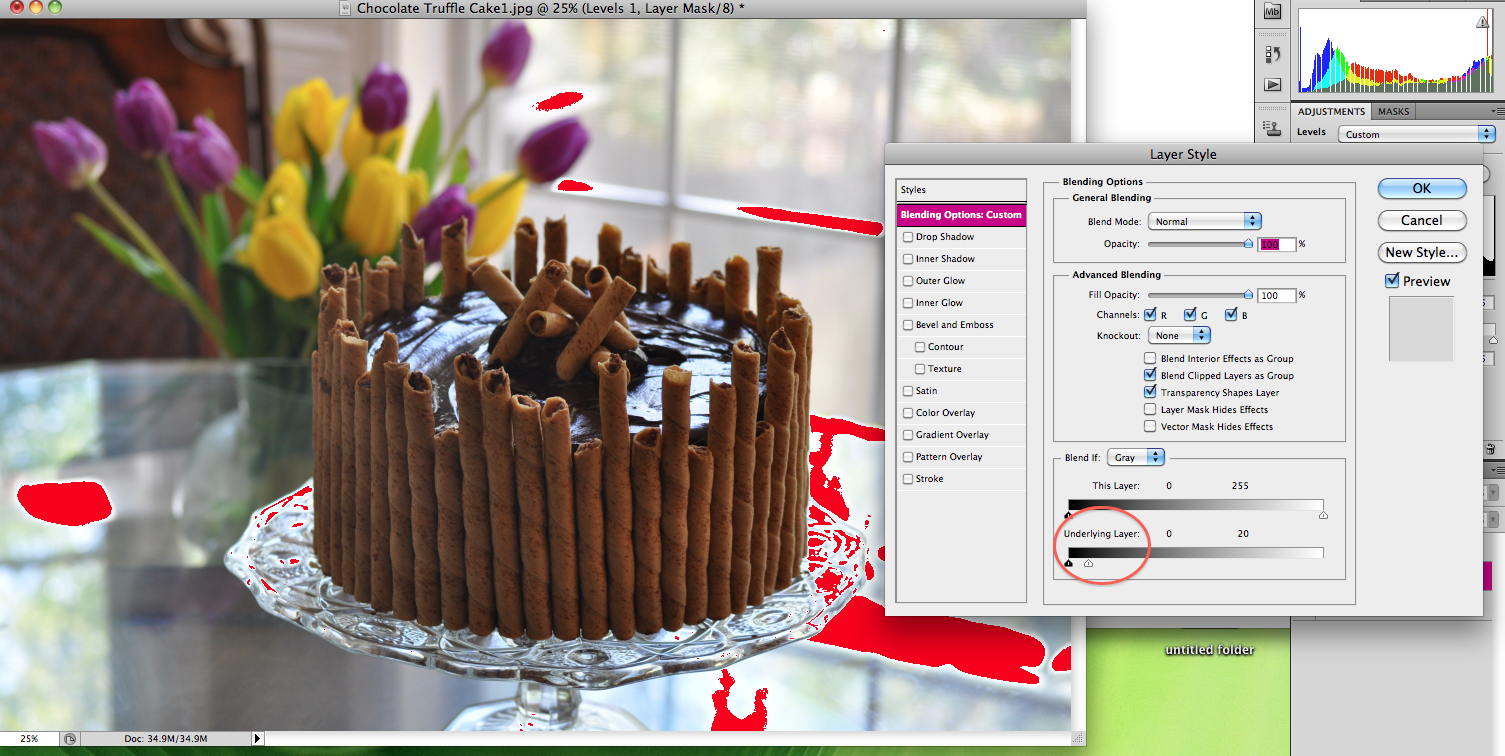
6 – In the new box that pops up, look at the bottom (“Blend If”) section. Here, you’ll want to reverse the black and white sliders in the “underlying layer” section. Note that your “start point” includes a white tab on the right and a black tab on the left:
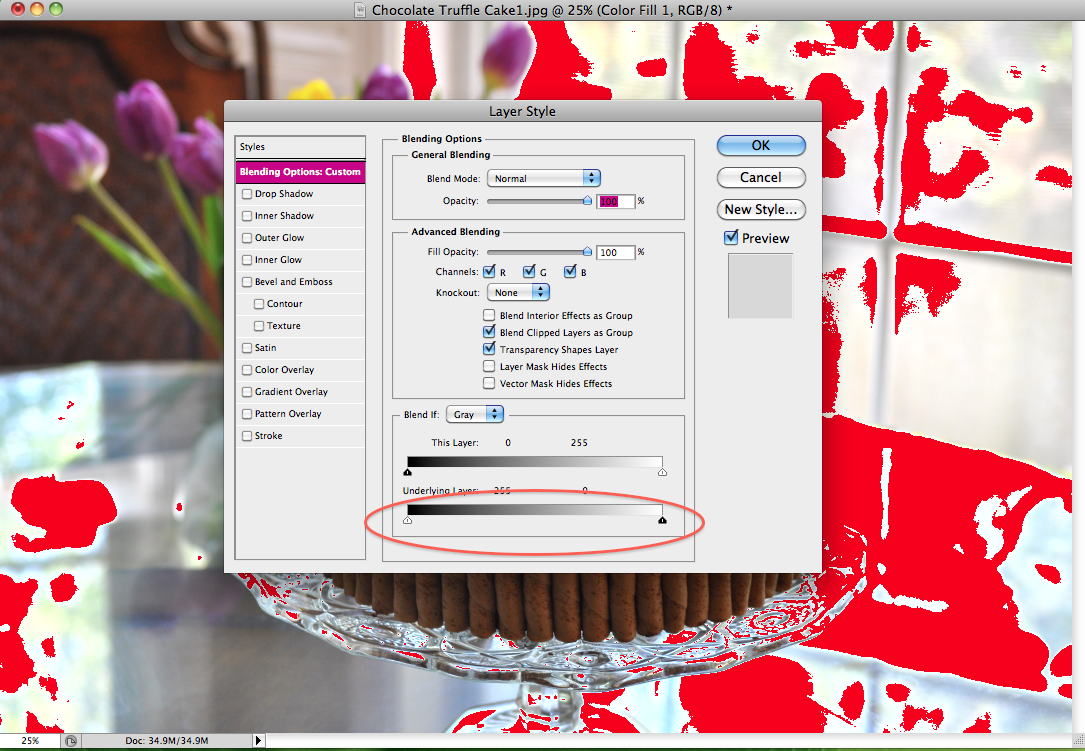
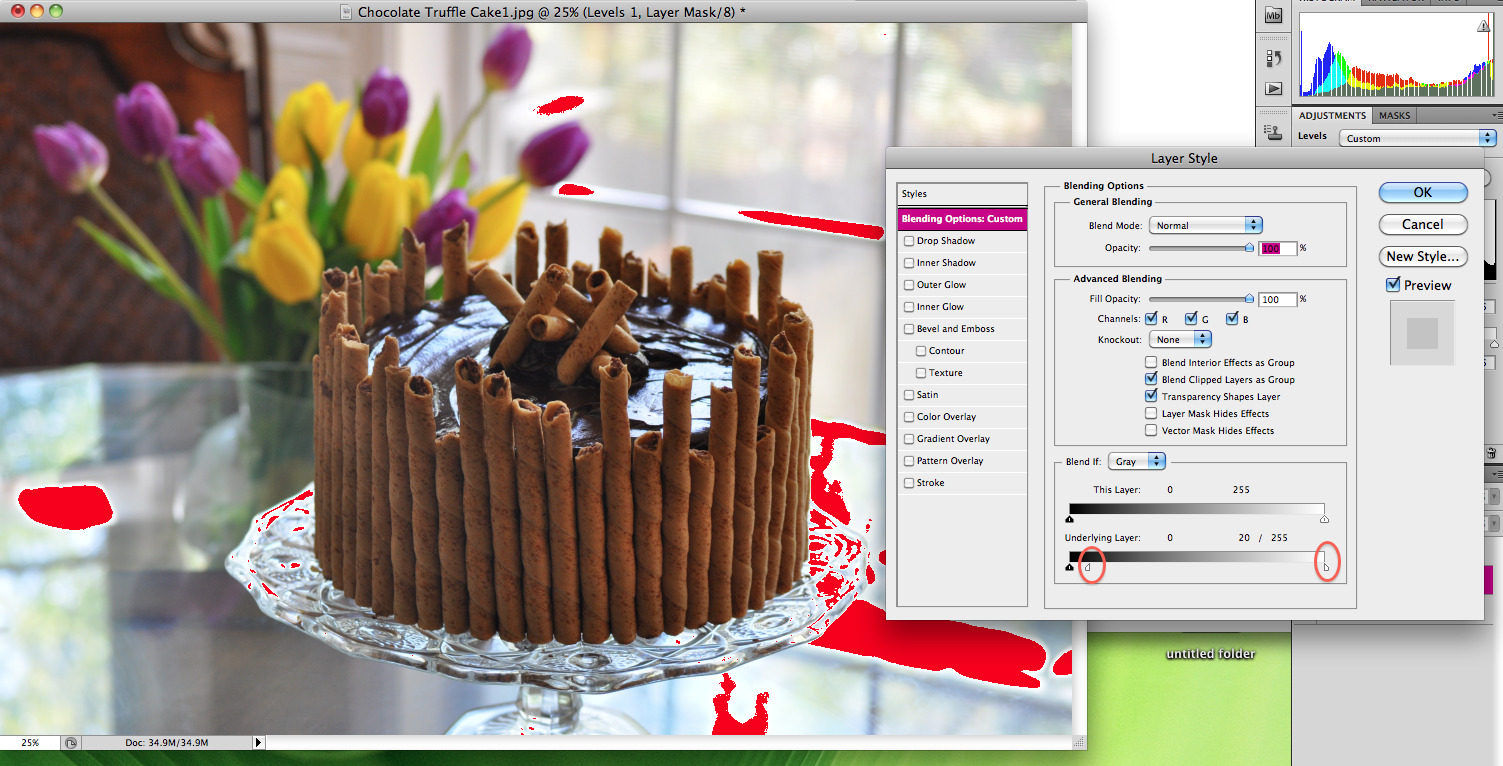
Reverse the two sliders for “underlying layer.” Here’s what they will look like when reversed (notice the sudden red spots in your image below?).
Now, click “ok”:
7 – At this point, PhotoShop is highlighting where all of the blow outs occur, and you can fix these spots by adjusting your “levels” layer in the layers history panel. To do so, right click on the “Levels 1” layer and select “blending options”:
8 – A new box will pop up that looks similar to the red layer’s blending options. Like this solid color layer, you’ll want to adjust the “underlying layer” using the arrows at the bottom of this box.
Take the white arrow tab on the righthand side and move it all the way to the left until as much fo the red “blow outs” disappear as possible (note: some blow outs may not be capable of being resolved):
9 – Then, hit “option” and click (or, “option” + click on Mac, “alt” + click on Windows) on the white arrow. The arrow will divid into two pieces. Drag the right-side of the arrow tab all the way back to the righthand side of the underlying layer bar. The image will suddenly become clearer, keeping fixed blowouts in tact and softening harsh edges that may have occurred in the last step.
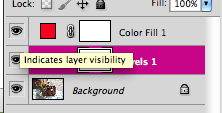
10 – Now, click the icon next to the top “Color Fill 1” layer in your layers history panel. This hides the layer and turns off the red highlighting.
Your image’s exposures and blow outs are now fixed. Time to add color pop filters and enhance sharpness. See tips #4 and #5 for these tutorials (links below).
—
As always, you can “hit the books” as they say to learn more about these five tips and tricks. Here are three of the food photography books I cannot live without:
1 – Hélène Dujardin’s Plate to Pixel (and here blog: Tartlette)
![]()
*great for learning about nuanced lighting, natural lighting, and plating. Dujardin has a great section on f-stops/aperture, ISO, and how to get creative in a traditionally mechanized field.
2 – Denise Vivaldo’s Food Stylist’s Handbook

*great for learning about industry tips and tricks, how to handle a professional photo-shoot, and what to have on hand.
3 – Nicole S. Young’s Food Photography: From Snapshots to Great Shots
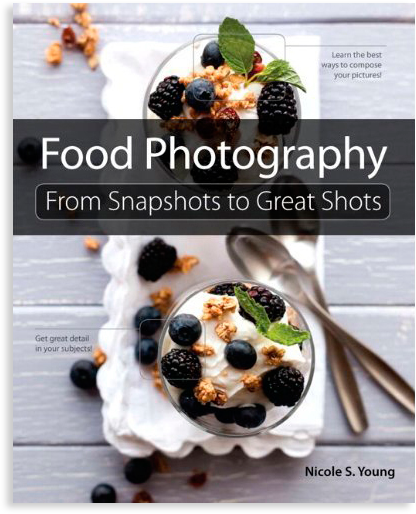
*worth the less than $14 purchase if only for her discussion of PhotosShop. Young is a certified PhotoShop specialist, and it shows with her screen shots and tips and tricks.
Blogger Articles (useful):
1 – “Tasty Food Photography” by Pinch of Yum
2 – “Photography on Simply Recipes” by Elise Bauer
3 – Lynda.com by Lynda Weinman
–Helana
—
Directory:
Or, See: Tip #1: “Fixing Exposure”
Tip #2: “Fixing Blow Outs in Photoshop”
Tip #3: “Filter -> Gaussian Blur”
Tip #5: “Saving Images for the Internet”
—
Follow me on Pinterest: http://pinterest.com/helana/
Twitter: https://twitter.com/DancesWLobsters
Facebook: https://www.facebook.com/pages/Clearly-Delicious/103136413059101
Tumblr: http://clearlydelicious.tumblr.com/
Instagram: http://instagram.com/helanabrigman
Fixing Blow Outs in Photoshop (Photo Editing Tips for Bloggers),
2 Comments
Clearly Delicious » Saving Images for the Internet in Photoshop (Photo Editing Tips for Bloggers)
May 17, 2013 at 7:07 am[…] Tip #2: “Fixing Blow Outs in Photoshop” […]
Clearly Delicious » Food Photography Tips for Bloggers
May 17, 2013 at 7:12 am[…] Tip #2: Blow Outs […]