
loading...
Tip #3: Filter -> Gaussian Blur
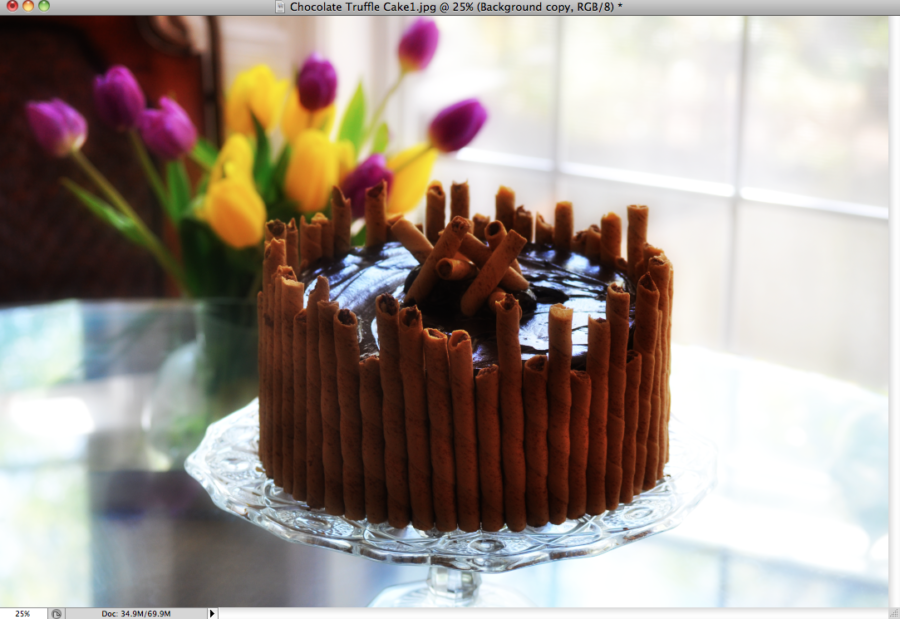
Two filters I always use when editing a food photo in post are 1 – “Gaussian Blur” and 2 – “High Pass.” Here, I discuss Gaussian Blur.
PhotoShop’s filters serve a wide ray of functions and have infinite variables you can play with and fix. For now, we’re just enhancing color and sharpening the image. With Gaussian Blur, you can add a layer of sophisticated saturation that truly brings your image to life.
To add filters:
1 – Click on the bottom layer, “Background” and drag it to the second icon from the right, “Create New Layer.”
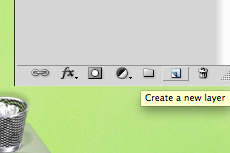
You’ll have a “Background Copy” popup in the layers history:
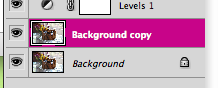
2 – Once you’ve added a new layer, you can apply a filter. I usually start with Gaussian Blur to enhance colors first (I’ll sharpen the image afterwards). Making sure your “background Copy” layer is selected (you can tell by whether or not it’s highlighted, as with the image above).
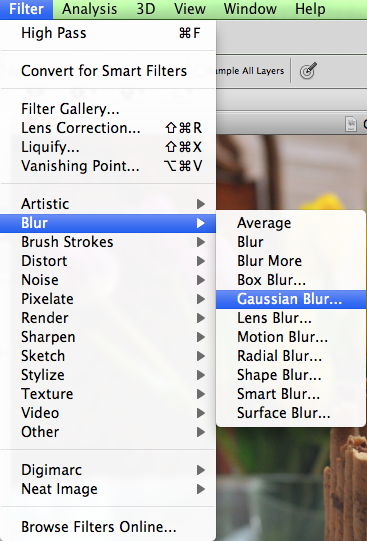
Click on Filter -> Blur -> Gaussian Blur.
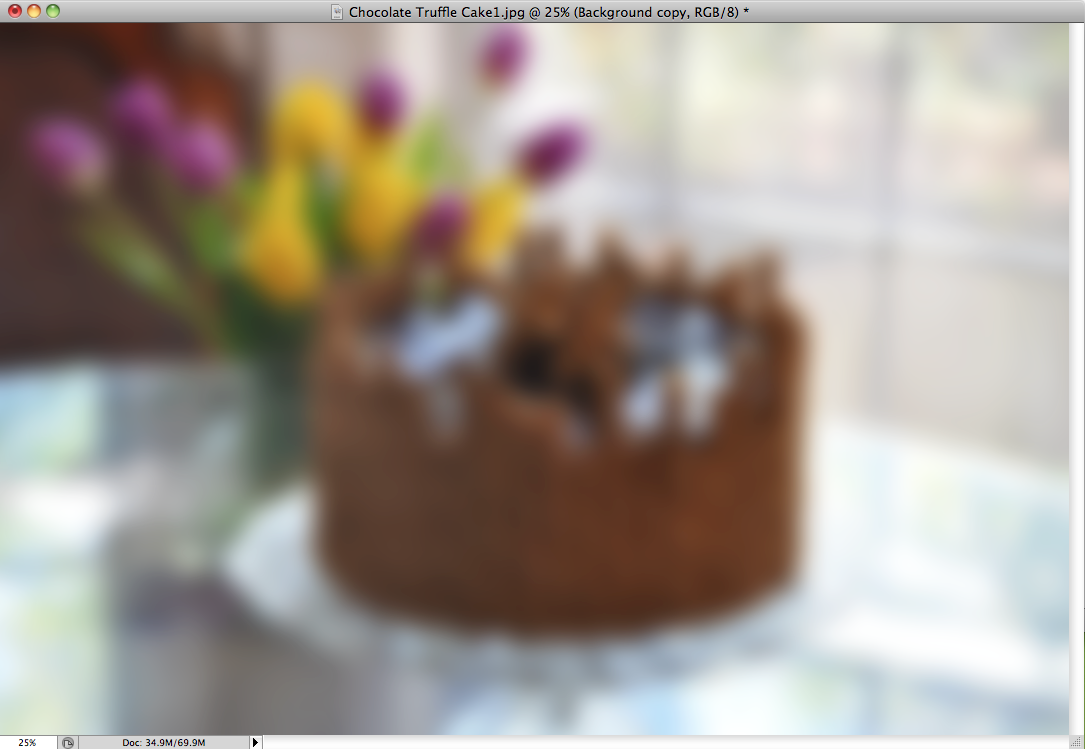
The blur pre-sets will pop up, and you can keep them at 1.0 Radius/pixels or adjust it to higher numbers like 10.0 or 50.0. For this image, I changed the sets to “50” (not pictured).
When you click “ok,” your image will be a glossy blur:
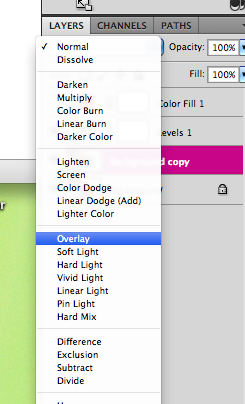
3 – You’ll want to change the filter to an overlay, so you can see through the blur and enhance colors seamlessly. Click on the first drop-down box under the Layers History Panel (your Opacity drop-down box will be to the right). Scroll down to “Overlay” and click to select this feature:
The image will darken and be super saturated:

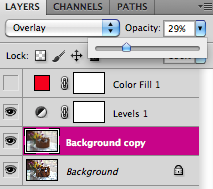
4 – To tone down the saturation to a manageable amount, adjust the percentage of your opacity (drop-down box in the upper-right corner of your Layers History Panel). Right now, the set value is “100%.” Usually, I adjust to somewhere between 20-30% depending on the image. For this picture, I dropped down the Opacity to 29%:
Now, it’s time to sharpen the image and make any final alterations before we save it for the Internet. See Tip #4 Filter -> High Pass here.
—
As always, you can “hit the books” as they say to learn more about these five tips and tricks. Here are three of the food photography books I cannot live without:
1 – Hélène Dujardin’s Plate to Pixel (and here blog: Tartlette)
![]()
*great for learning about nuanced lighting, natural lighting, and plating. Dujardin has a great section on f-stops/aperture, ISO, and how to get creative in a traditionally mechanized field.
2 – Denise Vivaldo’s Food Stylist’s Handbook

*great for learning about industry tips and tricks, how to handle a professional photo-shoot, and what to have on hand.
3 – Nicole S. Young’s Food Photography: From Snapshots to Great Shots
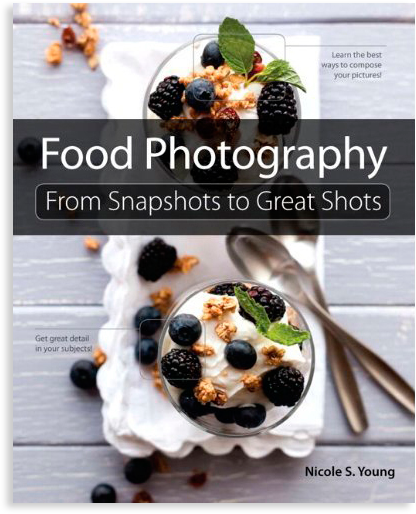
*worth the less than $14 purchase if only for her discussion of PhotosShop. Young is a certified PhotoShop specialist, and it shows with her screen shots and tips and tricks.
Blogger Articles (useful):
1 – “Tasty Food Photography” by Pinch of Yum
2 – “Photography on Simply Recipes” by Elise Bauer
3 – Lynda.com by Lynda Weinman
–Helana
—
Directory:
Or, See: Tip #1: “Fixing Exposure”
Tip #2: “Fixing Blow Outs in Photoshop”
Tip #3: “Filter -> Gaussian Blur”
Tip #5: “Saving Images for the Internet”
—
Follow me on Pinterest: http://pinterest.com/helana/
Twitter: https://twitter.com/DancesWLobsters
Facebook: https://www.facebook.com/pages/Clearly-Delicious/103136413059101
Tumblr: http://clearlydelicious.tumblr.com/
Instagram: http://instagram.com/helanabrigman
Adding Filters & Saturation in Photoshop (Photo Editing Tips for Bloggers),
No Comments