
loading...
Tip #4: Filter -> High Pass
The second of two filters I always use when editing photos in post is High Pass. In LightRoom, this filter functions more under “clarity” and “sharpening,” but here, it’s all one function.
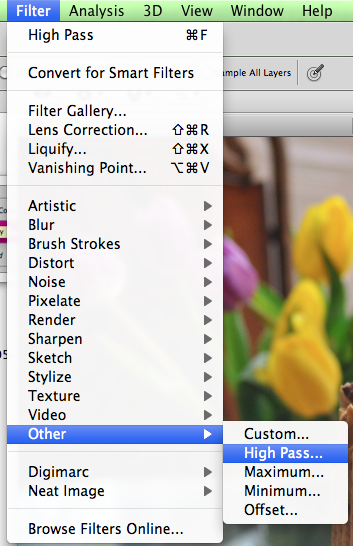
1 – To apply the High Pass Filter, repeat your steps from Tip #3 (create new background layer copy). Then, click on Filter -> Other -> High Pass:
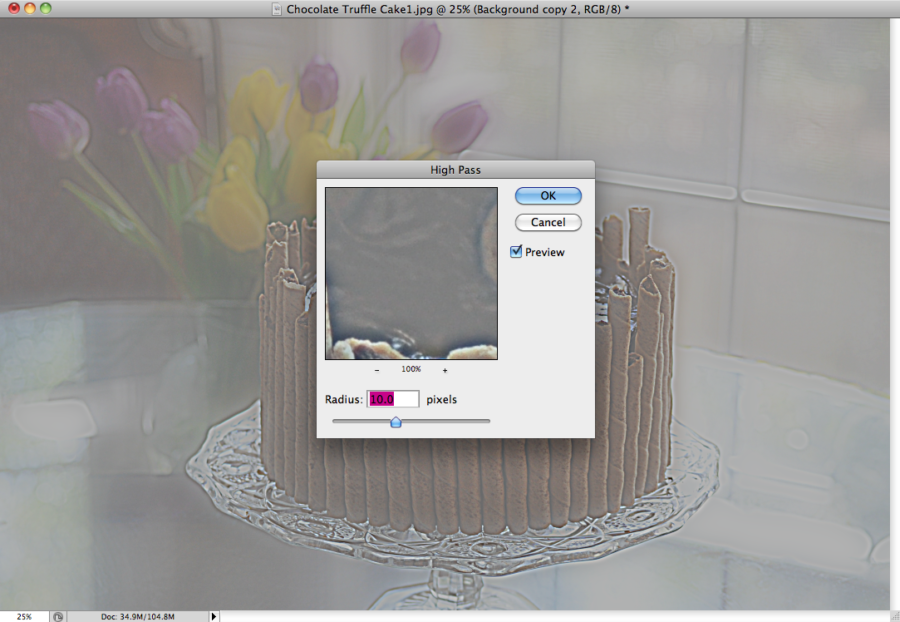
2 – When the High Pass dialogue box pops up, set the Radius / Pixels to 10.0. Click “Ok”:

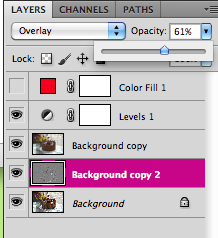
3 – Like the Gaussian Blur filter, you’ll want to select “Overlay” for the properties.
4 – Select a manageable Opacity (here, 61%):
The opacity here is all about personal preference. In some instances, dishes require as much sharpening as possible. In others, they’ll require very little. And, if you’re doing other kinds of photography–landscapes, portraits, or more creative work–sharpening will, again, come down to personal preference. I chose “61%” because the image was fairly sharp to begin with, but I’d like to see the tulips in the background have a little more pop, some more texture in the cookies and the window pane:
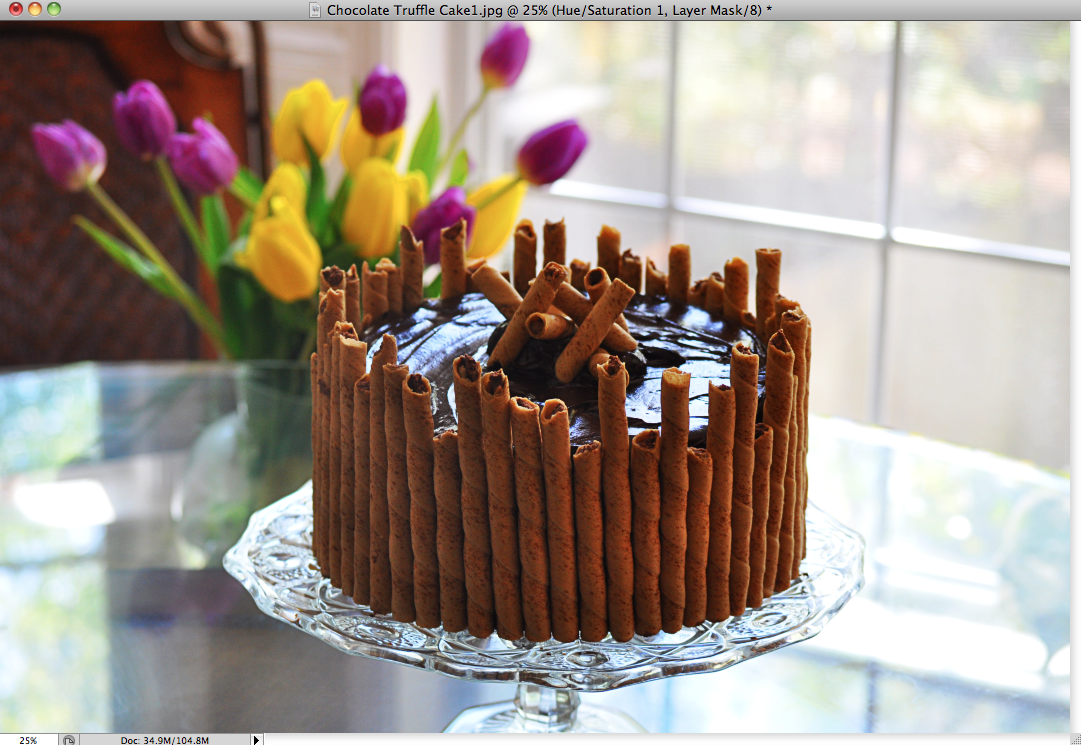
From here, so long as the image is sharp enough and colored the way I’d like, I’m ready to hit “save,” but with the Photoshop feature, “Web & Other Devices.” Read about this final tip here.
—
As always, you can “hit the books” as they say to learn more about these five tips and tricks. Here are three of the food photography books I cannot live without:
1 – Hélène Dujardin’s Plate to Pixel (and here blog: Tartlette)
![]()
*great for learning about nuanced lighting, natural lighting, and plating. Dujardin has a great section on f-stops/aperture, ISO, and how to get creative in a traditionally mechanized field.
2 – Denise Vivaldo’s Food Stylist’s Handbook

*great for learning about industry tips and tricks, how to handle a professional photo-shoot, and what to have on hand.
3 – Nicole S. Young’s Food Photography: From Snapshots to Great Shots
*worth the less than $14 purchase if only for her discussion of Photosshop. Young is a certified Photoshop specialist, and it shows with her screen shots and tips and tricks.
Or, checkout these Useful Blogger Articles:
1 – “Tasty Food Photography” by Pinch of Yum
2 – “Photography on Simply Recipes” by Elise Bauer
3 – Lynda.com by Lynda Weinman
–Helana
—
Directory:
Or, See: Tip #1: “Fixing Exposure”
Tip #2: “Fixing Blow Outs in Photoshop”
Tip #3: “Filter -> Gaussian Blur”
Tip #5: “Saving Images for the Internet”
—
Follow me on Pinterest: http://pinterest.com/helana/
Twitter: https://twitter.com/DancesWLobsters
Facebook: https://www.facebook.com/pages/Clearly-Delicious/103136413059101
Tumblr: http://clearlydelicious.tumblr.com/
Instagram: http://instagram.com/helanabrigman
Adding Filters & High Pass in Photoshop (Photo Editing Tips for Bloggers),
1 Comment
Clearly Delicious » Adding Filters & Saturation in PhotoShop (Photo Editing Tips for Bloggers)
May 17, 2013 at 7:05 am[…] « » […]