
loading...
Exposure is one of the most important tips I can give anyone when they start working with a photo in post.
I won’t detail the more high-tech skills you’ll need to know when working with apertures / f-stops and how the numbers really don’t make any sense (the lower the f-stop the higher your aperture? Or in the words of Hélène Dujardin, “it’s crazy!”)
But here’s what I can tell you when working in “post”:
Exposure Levels.
When working in Photoshop (or LightRoom), it’s easy to adjust exposure levels using the “Levels Feature” on the Adjustments Panel. Here’s how:
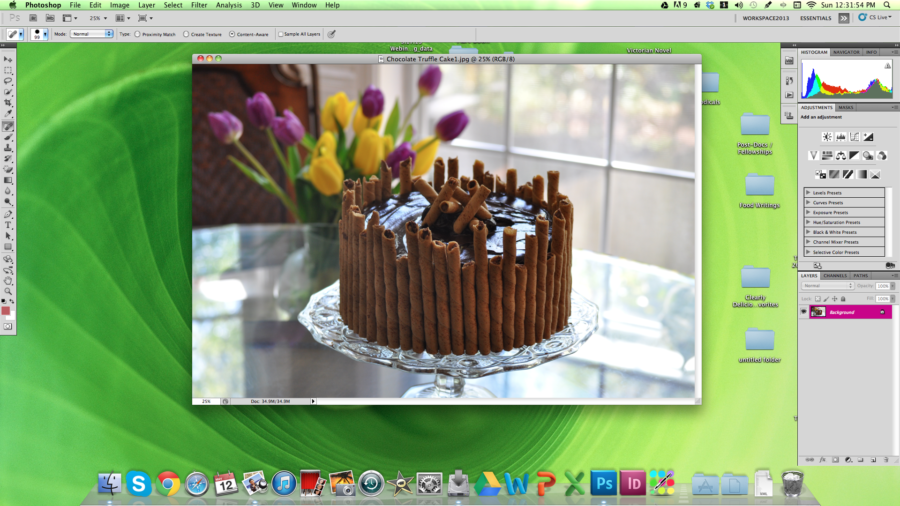
1 – Open your image in .raw format using PhotoShop (pictured: CS12.1 x64, using iMac on OSX 10.6.8):

2 – Click on the icon for “Levels” (an exposure histogram that resembles mountains or spiky hills):
![]()
3 – When the histogram pops up, you’ll have three sliders placed along the left, middle, and right of the histogram. You’ll also see where “Levels 1” has been added to your layers history:
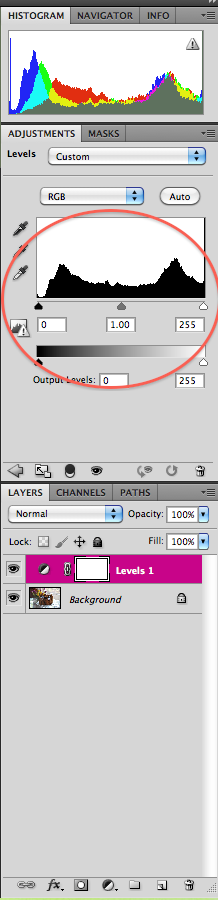
4 – Now, click on the slider on the right and slightly nudge it to the left until the image has brightened as much as you like. For me, I want the dark spots to reveal texture in the frosting that’s currently missing. I also want to be able to see the ridges in the cookies that encircle the cake. Fixing exposure helps make this possible.
And, to track how far you’ve adjusted exposure, the data in the box below will change numbers (for me, it’s moved from 255 to 215). Watch as the numbers change and your image brightens:

5 – Great – step 1 (fixing exposure) is really that simple. You’ve brightened the image, and the cake is more visible in dark spots. If you wanted to increase darkness or brighten highlights, fiddle with the sliders on the lefthand side and the center. Really, being comfortable with exposure means playing around with these settings and knowing what looks good to you.
And, here’s a food blogger tip: the number one reason my images have been rejected from FoodGawker in the past is “low lighting” or “under-exposed.”
As always, you can “hit the books” as they say to learn more about these five tips and tricks. Here are three of the food photography books I cannot live without:
—
1 – Hélène Dujardin’s Plate to Pixel (and here blog: Tartlette)
![]()
*great for learning about nuanced lighting, natural lighting, and plating. Dujardin has a great section on f-stops/aperture, ISO, and how to get creative in a traditionally mechanized field.
2 – Denise Vivaldo’s Food Stylist’s Handbook

*great for learning about industry tips and tricks, how to handle a professional photo-shoot, and what to have on hand.
3 – Nicole S. Young’s Food Photography: From Snapshots to Great Shots
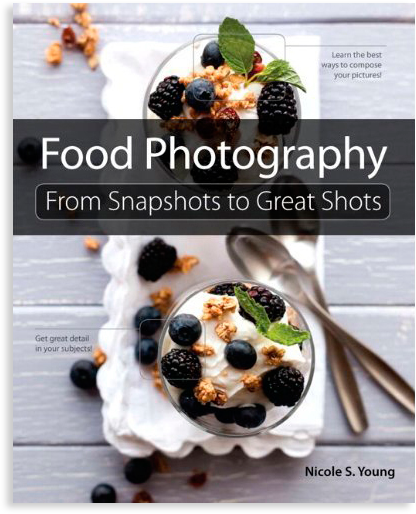
*worth the less than $14 purchase if only for her discussion of PhotosShop. Young is a certified PhotoShop specialist, and it shows with her screen shots and tips and tricks.
Or, checkout some Useful Blogger Articles (useful):
1 – “Tasty Food Photography” by Pinch of Yum
2 – “Photography on Simply Recipes” by Elise Bauer
3 – Lynda.com by Lynda Weinman
–Helana
—
Directory:
Or, See: Tip #1: “Fixing Exposure”
Tip #2: “Fixing Blow Outs in Photoshop”
Tip #3: “Filter -> Gaussian Blur”
Tip #5: “Saving Images for the Internet”
—
Follow me on Pinterest: http://pinterest.com/helana/
Twitter: https://twitter.com/DancesWLobsters
Facebook: https://www.facebook.com/pages/Clearly-Delicious/103136413059101
Tumblr: http://clearlydelicious.tumblr.com/
Instagram: http://instagram.com/helanabrigman
Fixing Exposure in Photoshop (Photo Editing Tips for Food Bloggers),
3 Comments
Clearly Delicious » Adding Filters & Saturation in PhotoShop (Photo Editing Tips for Bloggers)
May 17, 2013 at 7:06 am[…] Or, See: Tip #1: “Fixing Exposure” […]
Clearly Delicious » Adding Filters & High Pass in Photoshop (Photo Editing Tips for Bloggers)
May 17, 2013 at 7:06 am[…] Or, See: Tip #1: “Fixing Exposure” […]
Clearly Delicious » Food Photography Tips for Bloggers
May 17, 2013 at 7:13 am[…] Or, See: Tip #1: “Fixing Exposure” […]